Post Install Configurations
Introduction
After the installation and your first login to the tool, you will need to complete a few additional installation steps using the web interface.
Company Setting
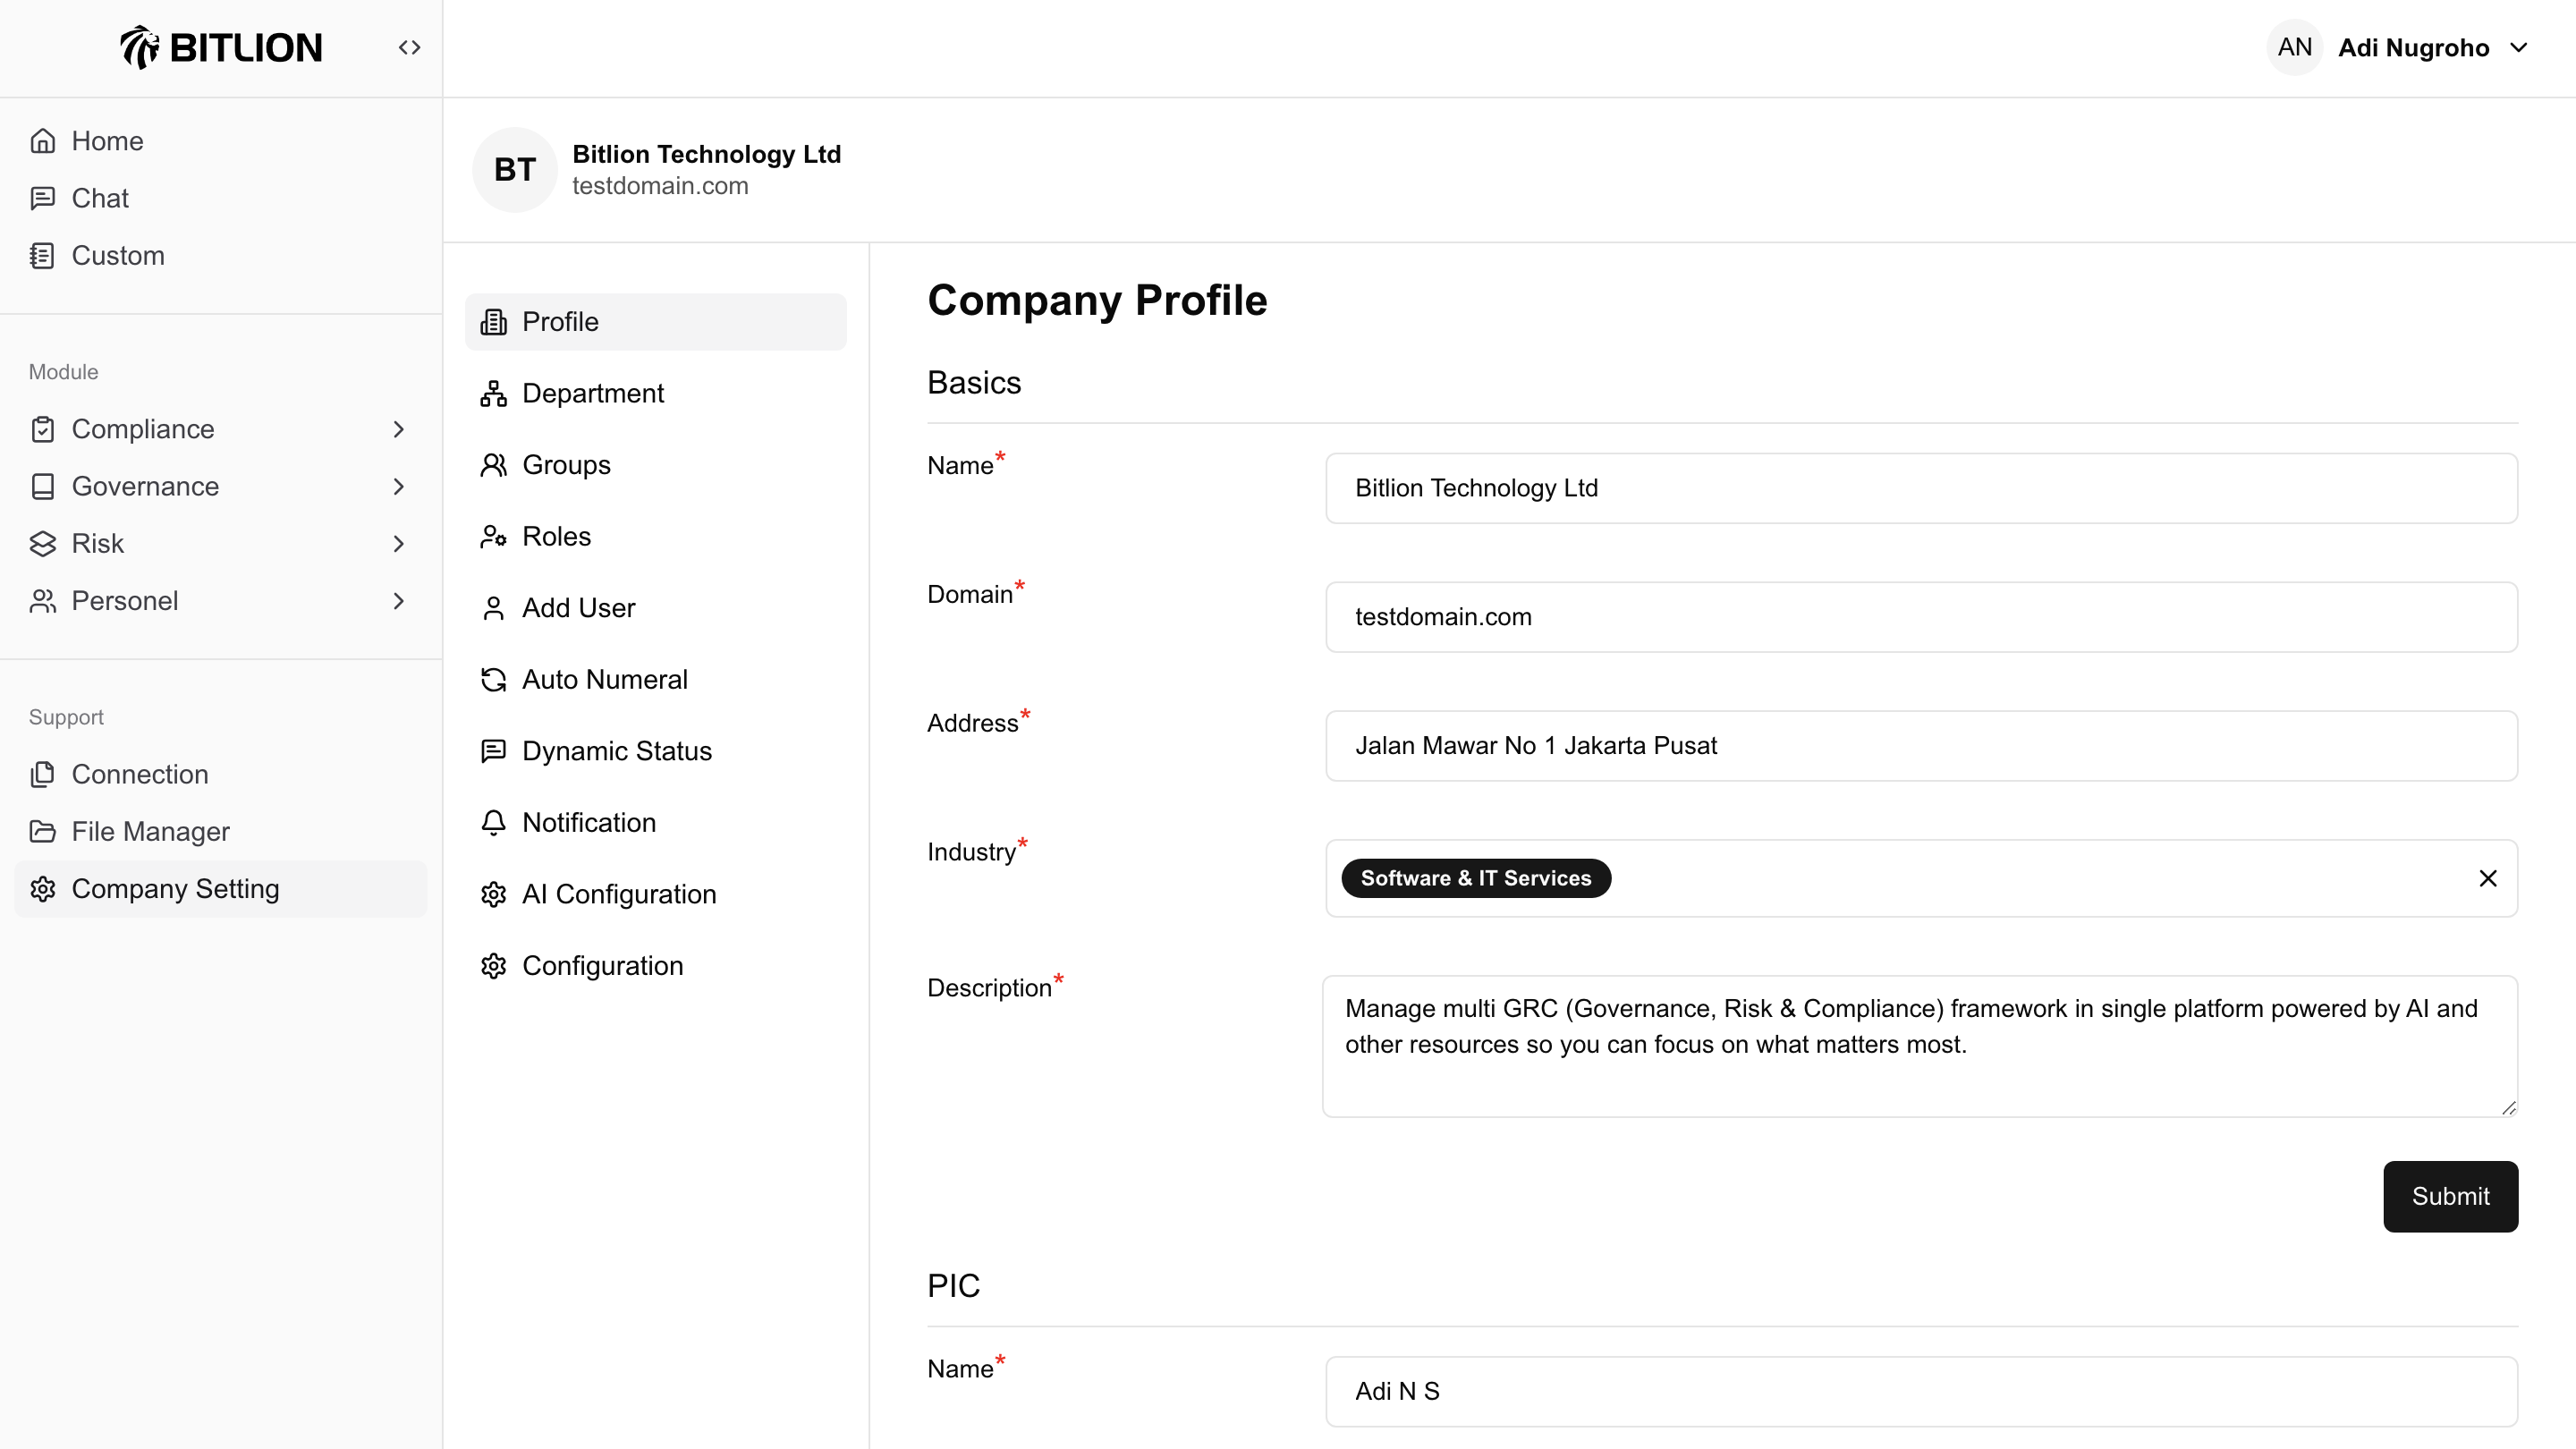
After you successfully login into your dashboard you will be redirected into company Setting which become the center of all config to start your GRC Program.
Here we have several config
- Profile
- Departement
- Group
- Roles
- Add User
- Auto Numeral
- Dynamic Status
- Notification
- AI Config
- General Config
Premium Version Bitlion
Open Source Version
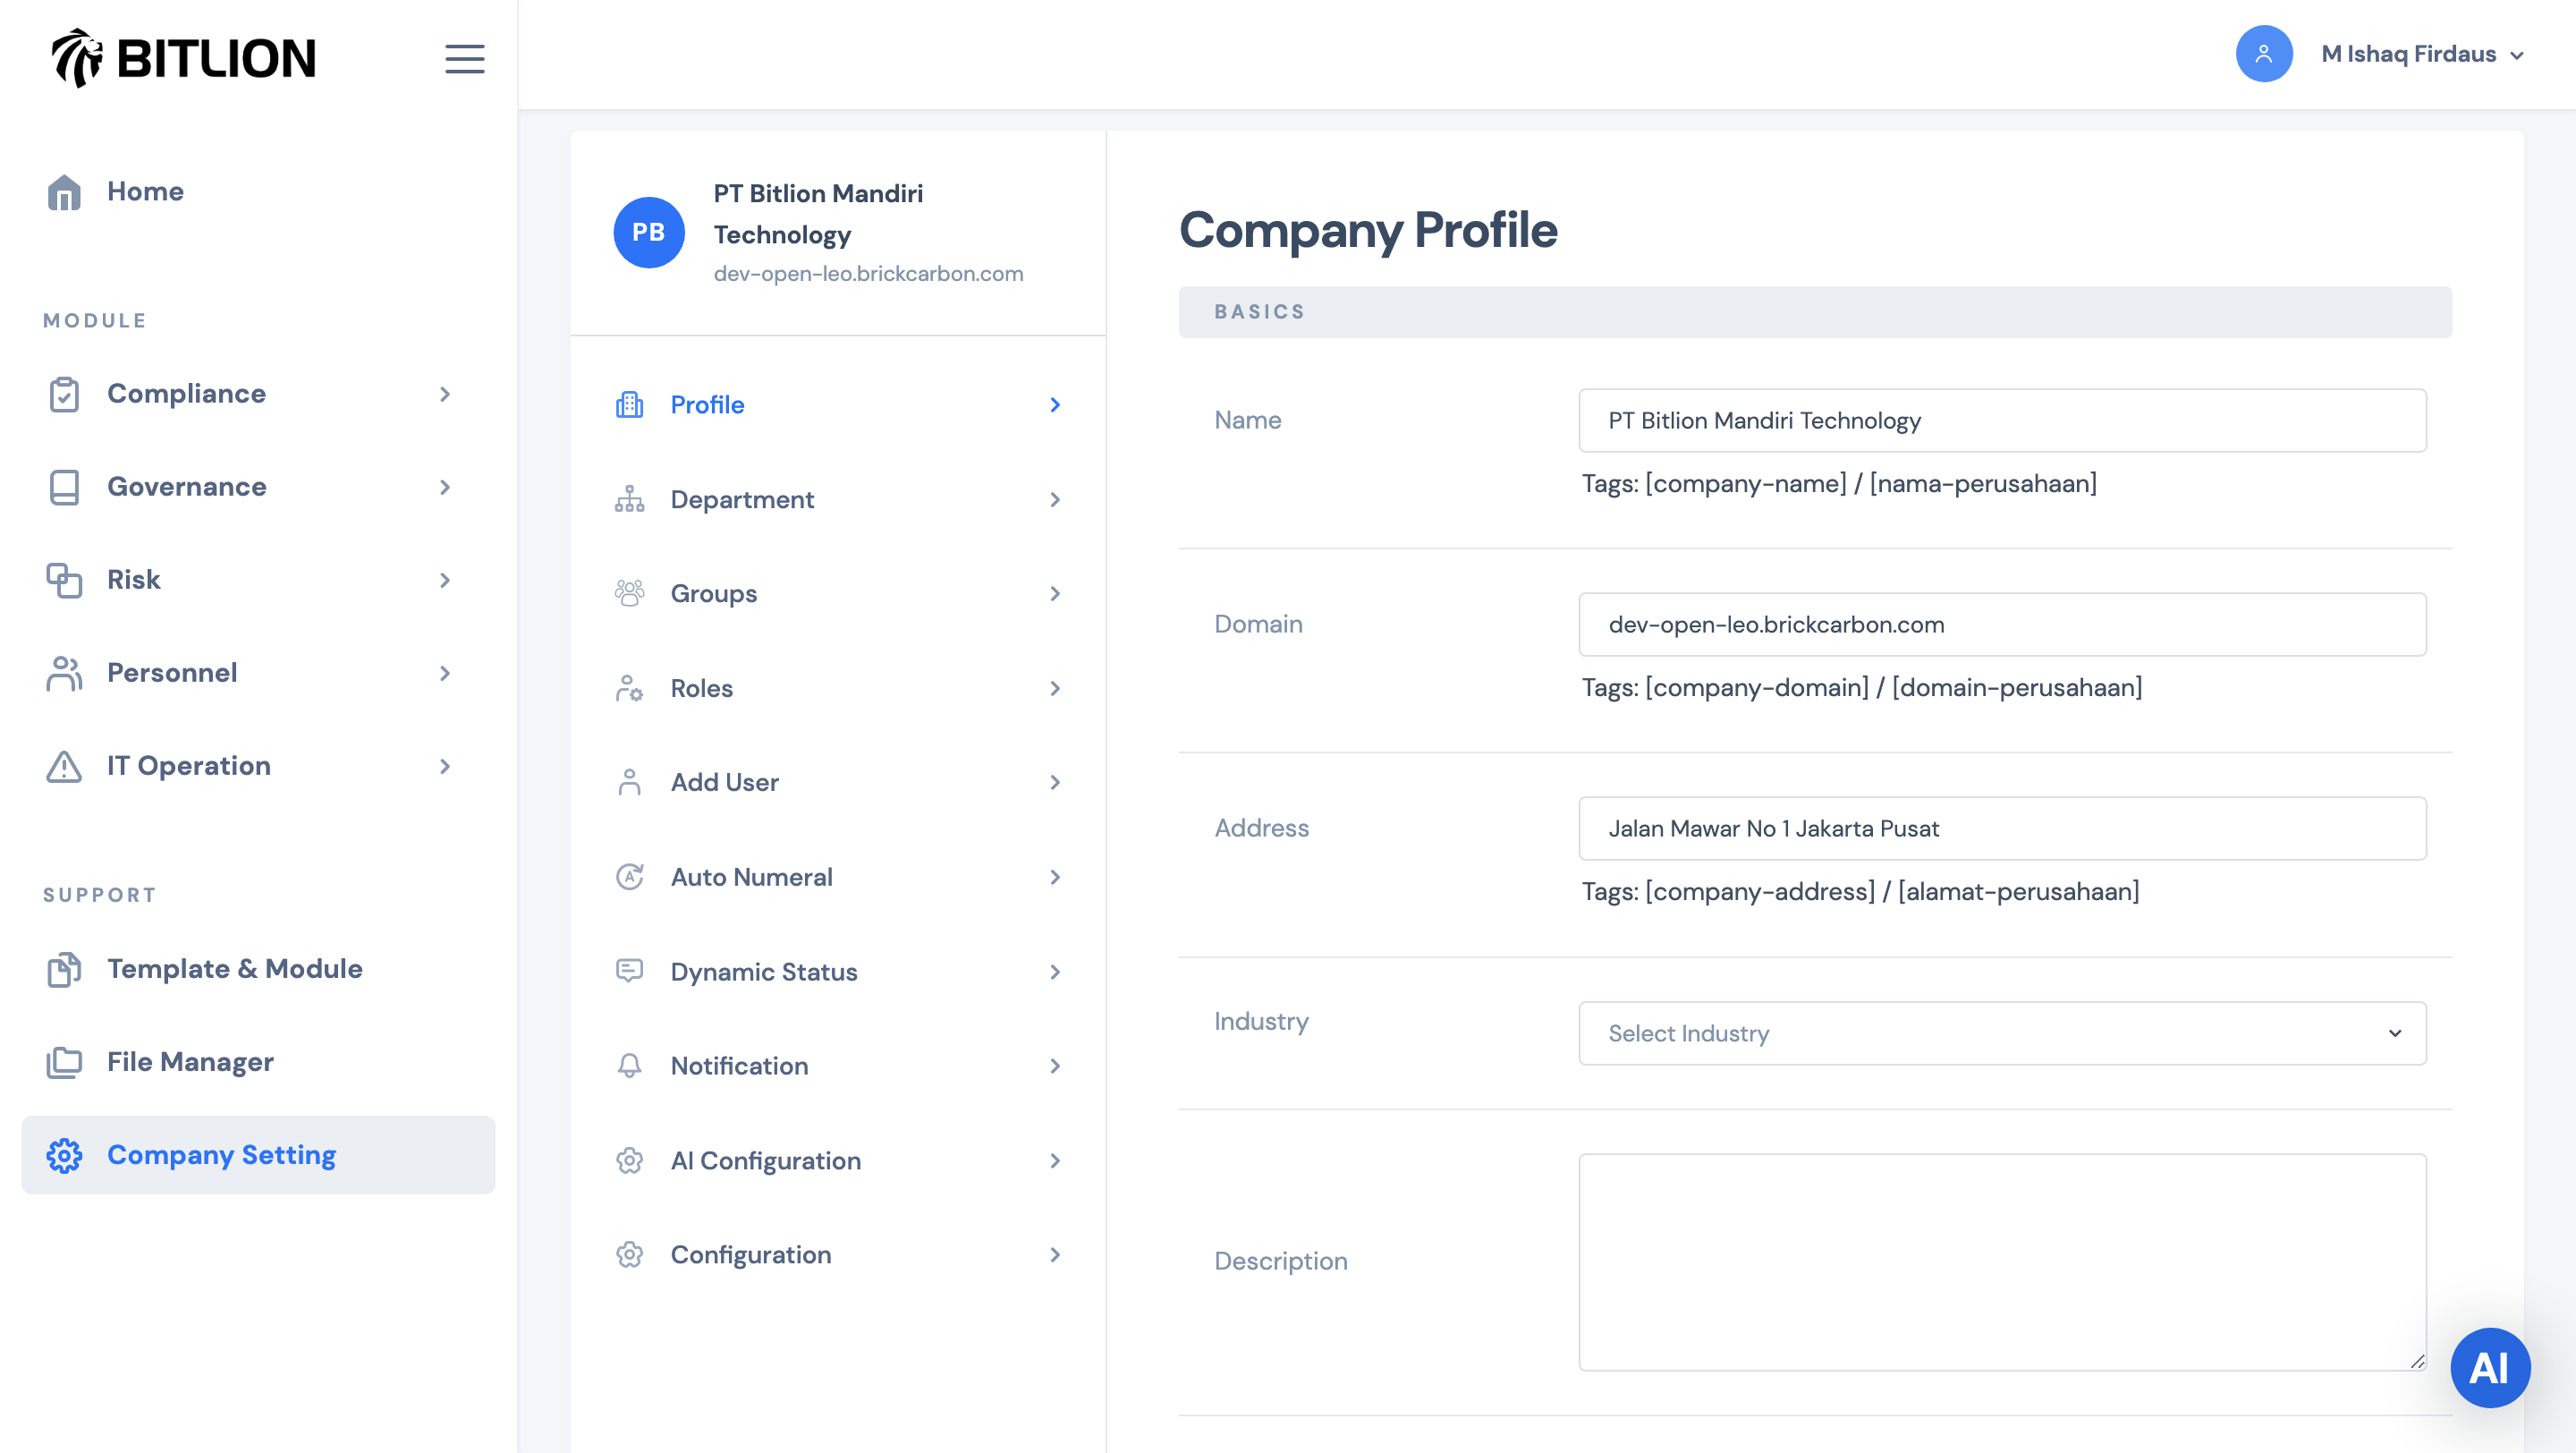
Basic Profile
Bitlion requires you to input basic company identity profile, this information used by Bitlion to personalized templates such as policy template, internal controls, data privacy and risk management, This is required by the system with minimum you should fill the form
- Name your registered company
- Your Company Domain or Website Address
- Your Office Address
- Industry
- Description of your company
Note : The description form is very crucial you can put as many as possible information such as, what is your product, missions, vissions, services etc
PIC
Add who is the person responsible to manage and maintain this dashboard, this can be a team and general email such as : legal team, [email protected]
Currency
Adjust your currency at Company Setting and scroll down and choose :
- US Dollar
- Rupiah
Note : Please contact us if you need to add new currency
Custom Logo
Under “Company Setting/Profile/Custom Logo” you can change the default logo on the system so it reflects your corporate identity, you will need a transparent background if you want to match Bitlion black&white color palette. You can also change the favicon using very small rounded design. Please consider logo file size accordingly
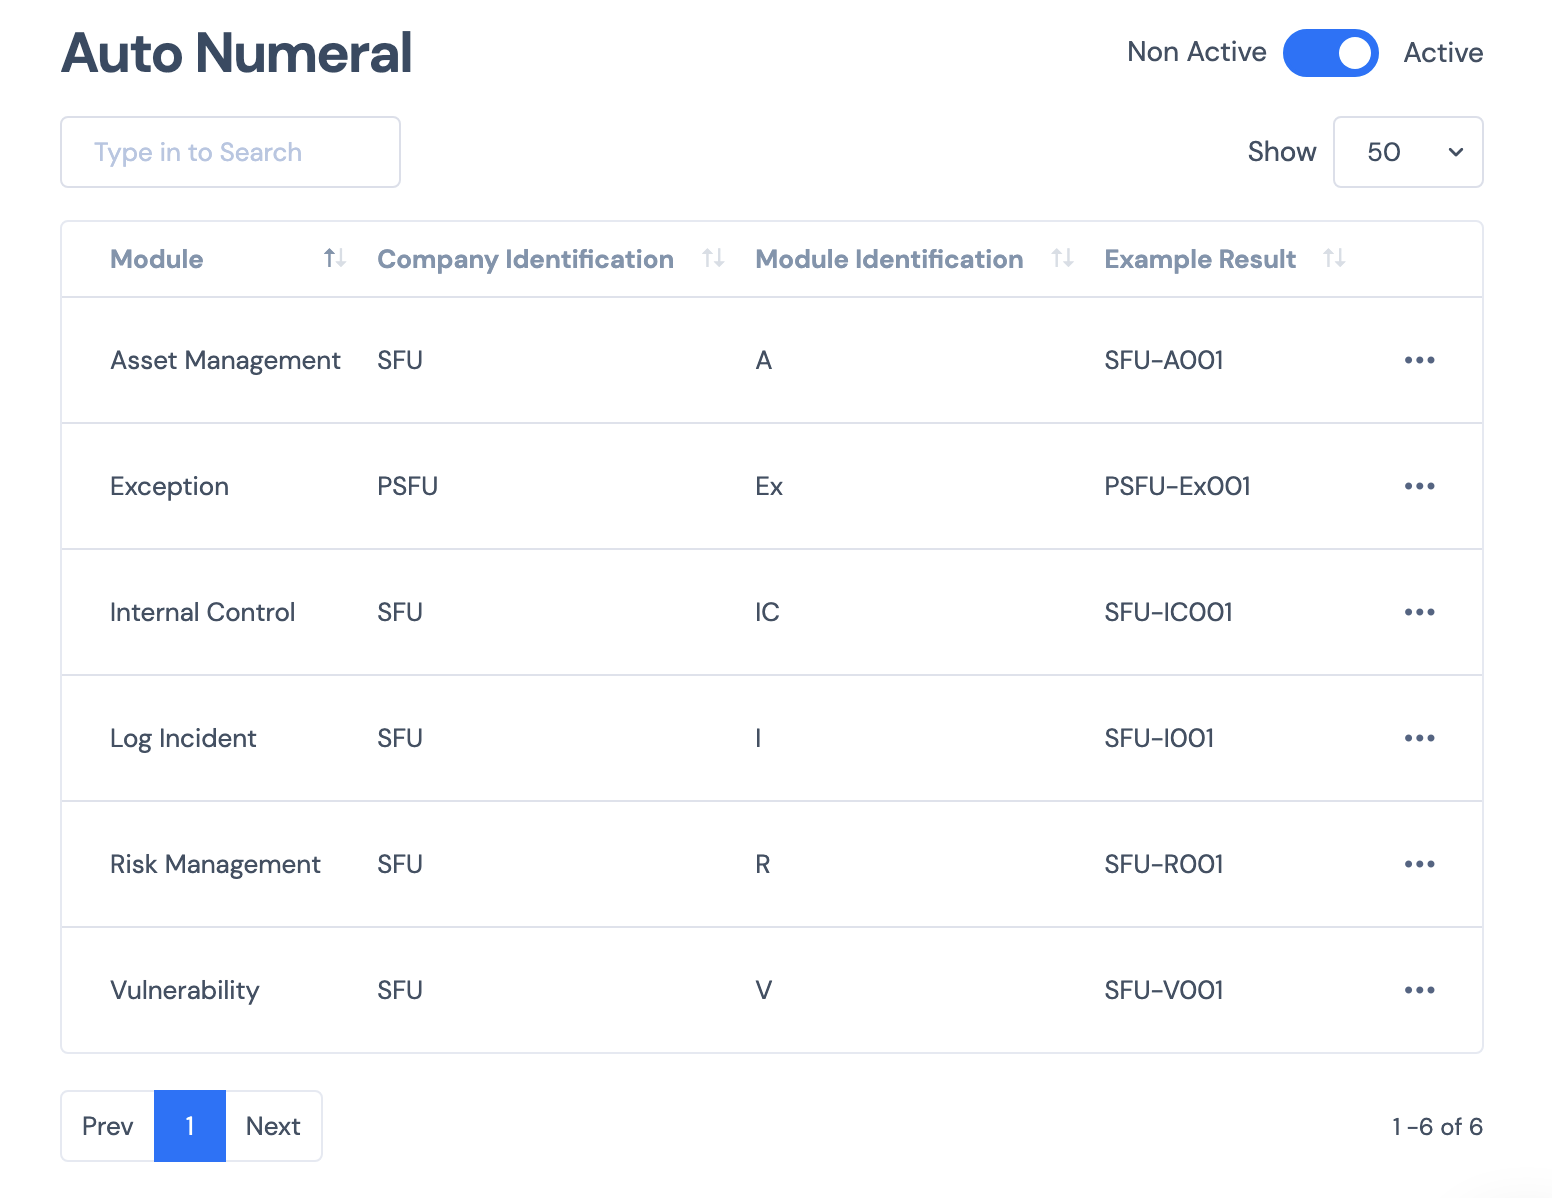
Auto Numeral
Many of our modules use auto-generated numbering to identify and manage documents created by the system. Using this feature, you can set a custom prefix to match your company's numbering standards and procedures.
How It Works
The auto-numbering system typically includes the following components:
Prefix: A customizable string (e.g., "INV", "PO", "TRX") that helps classify the document type.
Module Identifier Format : Our modules identify using its first letter code (Internal Control = IC, Risk = R)
Sequential Number: A system-generated number that increments with each new document created (e.g., 001, 002, 003...).
Customization
Using this feature, you can:
Set your own prefix to match your company’s document coding standards.
Define the starting number for the sequence.
Choose whether to use our standard module format.
Ensure document IDs are unique, organized, and easily trackable.
Example
If you set the prefix as BL, in module RISK and the system generates document number 001, the result will be:
BL-R001
this means document will start from 001
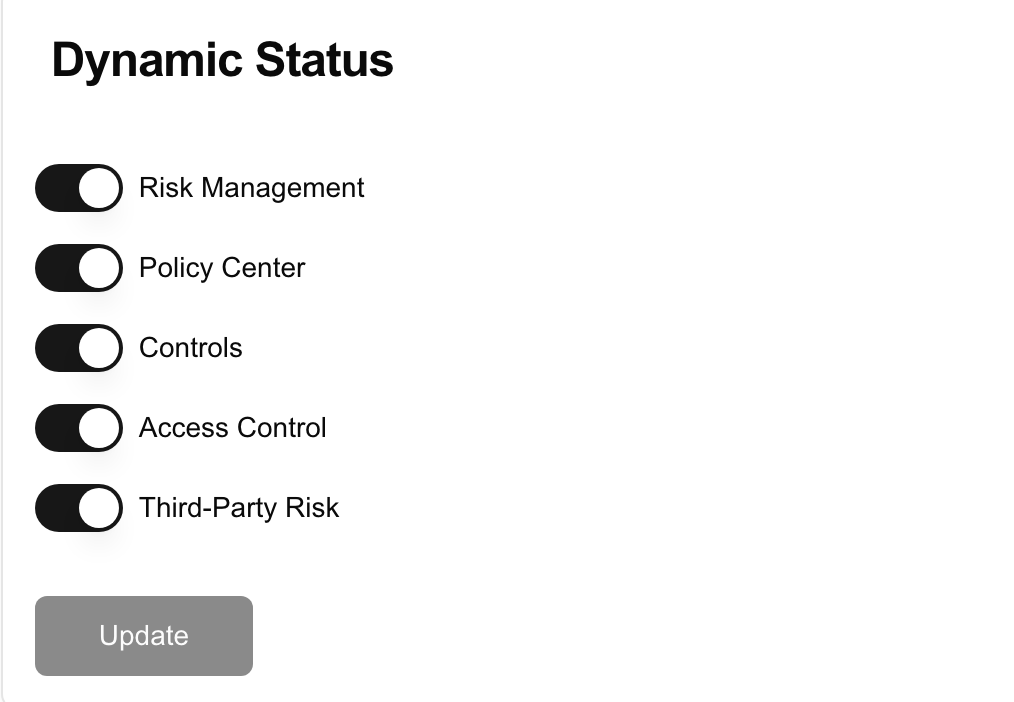
Dynamic Statuses
We have dynamic status setting to decided whether you will use it or not in your compliance program will will discuss more about this in different docs focus on talking Dynamic Status